Home Water Heaters, The Forgotten Appliance
By Randy Baldwin
 The water heater is one of those plumbing appliances we have in our home that we never really think of until there’s a problem. As long as it keeps doing its job, giving us plenty of hot water for showers, laundry and the dishes, we figure everything is going fine. If our energy bills go up, we figure it’s the gas or electric companies increasing their prices, not our water heater using more and more energy to heat our water.
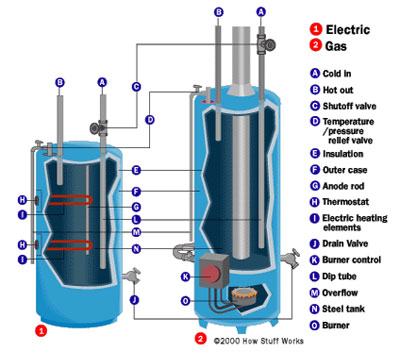
In reality, your home’s water heater endures more wear and tear than almost any other plumbing appliance in your home. “How’s that?” you ask. It’s because it’s running all the time. Day and night the metal inside your water heater’s tank soaks in a hot water bath that, unless you filter your home’s water, comes loaded with minerals, sediment and other chemical compounds that accelerate metal corrosion. Chemicals that settle on the interior of the water heater’s tank in a thick coating of slimy mud and rust that reduces your heater’s efficiency and eats away the metal until it catastrophically fails all over your hardwood floors and carpet.
Compared to many other household chores, water heater maintenance is really pretty easy, and yet a surprising number of people don’t know how to do it. By simply flushing the tank of sediment once every 6 months, a homeowner can add years of life to their water heater.
To flush your heater’s hot water tank, you will need:
Eye protection (hot water and/or sand in your eyes is no fun, believe me.)
A pair of pliers
Possibly a screwdriver
A hose
You can use a regular garden hose. However, you may want to consider purchasing a dedicated hose that you can leave attached to the water heater and simply unroll every time you drain it. In addition to saving you the trouble of lugging a hose into your home every six months, this will also reduce the wear on the drain valve’s threads. Most modern heaters have nylon (plastic) spigots for their drain. If your hose has metal threads, repeatedly taking it on and off will eventually strip the plastic threads and you’ll be calling a plumber to come replace them long before you need to replace the unit.
Step 1 – Cut the power to your water heater
Go to your electrical service panel. Locate and turn off the breaker for your hot water heater. If you don’t, your heater will keep running, trying to heat water as you flush it down the drain. Just don’t forget to turn it back on when you’re done.
Step 2 – Locate the water heater’s drain
The drain for your water heater will be near the bottom of the tank and should look like a garden hose spigot.
Step 3 – Attach the hose to the water heater
Be sure to screw the hose all the way on to the drain. The water coming out will be full of sand and rust and it will be under pressure. If the hose comes loose, you’ll have one huge mess to clean up so, if necessary, use pliers to tighten it all the way on the bib. By the same token, don’t over tighten or you’ll be calling your plumber to replace the drain spigot long before you’ll need a new heater.
Step 4 – Stick the hose out the window
…or out the door or in a slop sink. Just be sure that the water you drain out of your heater doesn’t end up creating a mess somewhere else. Remember, you are removing months if not years of sediment and minerals. This is not the kind of stuff you want in your lawn. It will also be coming out of the hose under full pressure, so be sure to anchor it down and take steps to prevent splashing.
Step 5 – Open the drain
To open the drain valve on Whirlpool water heaters, like this one, you’ll need a screwdriver. Other brands may have handles on their valves or require a different tool. Open the drain valve slowly until you’ve got a full flow.
Step 6 – Let it drain
Depending on how long you’ve waited to flush your system, you may need to let your water heater drain for anywhere from five to twenty minutes. The water may be brownish and you will see flakes of scale, sand and little stones made up of mineral deposits. You’ll know you’re done when the water runs clear. If you run out of time before the water is 100% clear, don’t worry. The sediment will resettle at the bottom of the tank and your hot water will be as clean as it was, just come back in a month or two and drain the water heater again.
Step 7 – Close the valve and put away your hose
I figure this step doesn’t need a lot of clarification.
Step 8 – Turn your water heater back on
As I said in the beginning, don’t forget this step, or your shower in the morning will be a lot colder than you’d prefer. While most of the water you drained out of the heater’s tank came straight from the supply line at the bottom, a good portion of the hot water that was in the top of the tank got flushed out too. Depending on the size and type of heater you have, it will probably take an hour or two for the hot water to return to normal temperature.
Regularly Flushing Your Water Heater Can Save You Thousands
Ask ten plumbers how long the average water heater will last and you’ll get ten different answers. Part of the reason for that is water mineral and sediment content is entirely dependent on where you live and how you get your water. (The EPA requires municipalities to provide annual reports to residents. Click here to find the report for your area.) However, the answers will likely fall within a certain range. In a home with no water filtration or softening, and with no regular flushing of sediment, most plumbers would expect a water heater to last between five to seven years.
With regular flushing, most plumbers would agree, you can easily extend the life of a water heater up to eight to twelve years. Add whole house water filtration to the equation, and your water heater could last up to 15 years.
For questions on flushing your water heater, contact the manufacturer or your local plumber.
There’s good reason why Randy Baldwin is known as “The Plumberologist.” With over 20 years in the industry and unmatched skills as a licensed plumber, Randy is as close as anyone could come to holding a doctorate of science in plumbing. Throughout the Northern Virginian Washington DC metropolitan area, there are few if any with Randy’s experience and skill at tackling some of the biggest plumbing issues faced by the region’s home and business owners. Many area plumbers, when faced with a problem they feel is too big to handle, such as a sewer main rupture, will call on Randy and his team at Frugal Rooter. Visit their website at frugalrooter.com.
Article Source: http://EzineArticles.com/?expert=Randy_Baldwin
 If you really want the best deals in investment properties, you have to increase your odds by finding more deals. Who is more likely to get a cheap apartment building, an investor who looks through the MLS listings once and then calls it a day, or the one who uses ten resources?