5 Holiday Hosting Disasters and How to Avoid Them

By: HouseLogic

Take a look at the most common things that can go wrong when you have guests and learn how to prevent them.  clean_oven

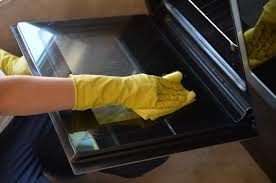
Imagine you’re preparing to host your annual holiday party, and you’re past the point of no return. The veggies and meats have been bought. Guests are already braving busy airports and crowded highways to get to your home — and then your oven won’t turn on. Your home-cooked meal has quickly turned into a microwave dinner.

That’s just one of many hosting nightmares that can end your holiday party before it even begins. Thankfully, some of the most damaging mishaps easily can be avoided. We collected five of the most prevalent issues and give you preventative tips to keep your holiday party on track.

Problem: The oven doesn’t heat

For any holiday occasion, the oven is the most important appliance in your house. If it fails to work, the centerpiece of your meal could go from roasted beef, ham, duck, or Tofurky to Peking Duck from the local Chinese takeout joint.

How to avoid:

  • There are any number of reasons a stove can break, but one common cause of disaster is easy to prevent. Don’t self-clean your oven until AFTER the holidays. You risk blowing a fuse or a thermostat, and tracking down an oven technician around the holidays can be tough.

Problem: The kitchen sink clogs

The day after Thanksgiving is the busiest of the year for plumbers. The prime cause of this clog-a-thon is the mistreatment of drains when cooking holiday feasts. We hope your Thanksgiving went well, and that you avoid clog-a-thons for the rest of the holidays.

How to avoid:

  • Fats and cooking oils can solidify in your pipes, so never dispose of them in your kitchen sink.
  • If you have a garbage disposal, make sure it’s running before anything goes in it, and never feed it any stringy, fibrous, or starchy foods like poultry skins or potato peels.
  • To fix, don’t rely on chemical drain-clearing products that can harm your pipes. Use a snake instead, available for $15 at your local hardware store. Best to keep one on hand.

Problem: The heat goes out

As the party’s host, you’re supposed to hang guests’ coats — not apologize to them for having to keep them on. A lack of heat can stop a holiday party dead in its tracks.

How to avoid:

  • The key to avoiding freezing your party to a standstill is regular maintenance of your HVAC. Every 90 days, a new one-inch pleated furnace filter should be installed. If you haven’t done it in a while, now’s a good time to replace it.
  • Also inspect insulation on refrigerant lines that are leading into your house. Replace them if they’re missing or damaged.

Problem: The toilet stops up

Toilets have a way of clogging up at the worst times, such as during parties and when you have overnight guests. This is especially true if you have a low-flow toilet from the early 1990s.

How to avoid:

  • Don’t flush anything other than sewage and toilet paper down the toilet. And there’s nothing wrong with putting up a polite note to remind your guests to do the same.

Problem: The fridge doesn’t cool

Without a properly functioning refrigerator, your meat could get contaminated, your dairy-based treats could go sour, and you may not be able to save your yummy leftovers. To avoid discovering a warm fridge after it’s too late, take these simple precautions.

How to avoid:

  • Get a thermometer for your refrigerator to make sure each shelf stays below 40 degrees and you can be aware of any temperature changes.
  • Also make sure the condenser coils located on the back of the unit or beneath it are free to breathe. Coils blocked from circulating air by cereal boxes atop the fridge, or dirtied by dust or pet hair can prevent a fridge from keeping cool.

Visit HouseLogic.com for more articles like this. Reprinted from HouseLogic.com with permission of the NATIONAL ASSOCIATION OF REALTORS®.


LED Holiday Lights: 6 Need-to-Know Tips

By: G. M. Filisko

LED holiday lights vs. old-fashioned bulbs: 6 tips to help you decide which is right for you.  xmas_lights

Should you chuck all your good old holiday light strings and buy new LED holiday lights? Here’s how to decide.

1.  LED holiday lights save you money. LED lights use up to 90% less energy than traditional holiday lights, according to the U.S. government’s Energy Star program.

That results in a $50 energy savings for the average family during the holidays, says a Sierra Club spokesperson.

Put it into perspective: The amount of electricity consumed by one 7-watt incandescent bulb (in a light string) could power 140 LEDs — enough to light two 24-foot strings, says Energy Star.

2.  But LED lights typically cost more than old-fashioned holiday lights.

  • 100-bulb string of LED lights: about $20 to $46
  • 100-bulb string of conventional lights: about $7 to $12

But shop around because LED prices are coming down. And you’ll likely find sales on LED holiday lights — if not before the holidays then certainly after.

3.  LED holiday lights last and last. LED bulbs can keep your season bright for as long as 100,000 hours, says Cathy Choi, president of Moonachie, N.J.-based Bulbrite, which manufactures LED and regular bulbs. That’s substantially longer than the life of your old holiday light strings.

4. You can string a BIG strand of LED lights. Safety wise, you shouldn’t connect more than three traditional light strings, but you can connect up to 87 LED holiday light strings, totaling a whopping 1,500 feet, Choi says. So blow your neighbor’s display away by cocooning your house in lights:

  • You won’t have to buy as many extension cords.
  • You can take your holiday lighting display further away from the outlet.

5. LED lights reduce the risk of fire. They stay cooler than incandescent bulbs, according to Energy Star.

6. How about that hue? Some people stick with their old lights because they don’t like the brighter hue that white LED holiday lights emit. But Choi says manufacturers now offer a “warm white” bulb that more closely mimics the glow of an incandescent light. Be sure to read the label to choose a bright or warm white and to ensure what you’re purchasing is Energy Star-certified.

Colored and color-changing LED holiday lights are more vibrant than conventional lights, making your display easier to see from the street, Choi says.

Visit HouseLogic.com for more articles like this. Reprinted from HouseLogic.com with permission of the NATIONAL ASSOCIATION OF REALTORS®.


How to Clean Up After Thanksgiving in Half the Time

By: Lisa Kaplan Gordon

The Pilgrims were on to something when they planned a Thanksgiving potluck; here are other good ideas that’ll simplify your T-Day kitchen cleanup.

Want something to be thankful for? Check out these tips that’ll make your Thanksgiving kitchen cleanup faster and easier — and will give you more time to enjoy family and friends.

Plan a potluck: The first Thanksgiving wafeasts a potluck; so let your guests share the fun and bring dishes to share. Then make sure they take home their serving bowls and platters, which will cut down on dishes to wash and put away.

Decide on disposable: Leave Mom’s good dishes in the breakfront and set your table with disposable — and recyclable — place settings. Party stores sell plastic dishware that look like real china (12 dinner plates for about $13). After eating, collect and toss. If you can’t stand to set a table with anything but your best, use disposables for hors d’oeuvres and dessert.

Triple-duty cookware: Cut down on cleanup by selecting cookware that can go from oven to table to freezer. Or, serve food in edible containers, such as bread bowls or hollowed-out winter squash, which you can either consume or compost.
refrigerator
Empty fridge: Start your holiday with a clean slate, which will make the inevitable mess less daunting than piling clutter onto clutter. Before beginning Thanksgiving prep, pick up depressing home clutter and clean out your fridge to make room for ingredients and leftovers.

If possible, designate a shelf for Thanksgiving food, which should be empty when you start your meal, then filled with leftovers when you’re finished. In a week, clean out that shelf again. Make soup from leftover meat and veggies, and then freeze. Compost wilted greens. Toss old dairy products.

Prepare roasting pans: You won’t have to clean what you don’t get dirty. So line your turkey roasting pans with heavy-duty aluminum foil, or cook the bird in a bag. Pour drippings into a pot to make gravy, then throw away the liner.

Line garbage cans: Double- or triple-line garbage cans, which saves time when the cleaning campaign begins. After you toss a trash bag, there’s another waiting for action.

Soaking bin: Soak pots and pans as soon as you transfer food to platters. But instead of filling the sink with soaking pots, designate a small trashcan as the soaking spot. Fill it will soapy water and dirty pots, and hide it under a sink or in a mudroom. That way, your sink is free throughout the evening to clean as you go and rinse dishes on the way to the dishwasher.

Stop stains: Don’t let stains on carpet or rings on furniture set. While wine stains are still wet, dab with go-to cleaner hydrogen peroxide mixed with a few drops of dish detergent; blot with a clean cloth. Get rid of water stains on wood furniture with a dab of white toothpaste (not gel). Rub in the direction of the grain.

Pump up the music: Up-tempo music will give you a second wind for cleaning. So turn off the soothing dinner tunes and get rocking with our cleaning playlist.

Visit HouseLogic.com for more articles like this. Reprinted from HouseLogic.com with permission of the NATIONAL ASSOCIATION OF REALTORS®.


9 Ways to Avoid Gobbling Up Energy on Thanksgiving

By: Courtney Craig

Wasting energy on Thanksgiving? Don’t be a turkey.

A Few Days Before Thanksgiving  dimmer_switch

1. Install a dimmer switch for the dining room chandelier. Every time you dim a bulb’s brightness by 10%, you’ll double the bulb’s lifespan. Most CFLs don’t work with dimmers, but you can create mood lighting with incandescents and LEDs. The dimmer switch will cost you about $10.

2. Plan side dishes that can cook simultaneously with the turkey. If you cook dishes at the same temperature at the same time, you’ll reduce the amount of time the oven has to be running — it’s easier for the cook and saves energy, too.

When You Start Cooking

3. Lower your house thermostat a few degrees. The oven will keep the house warm. You also can turn on your ceiling fan so it sucks air up, distributing heat throughout the room.

4. Use ceramic or glass pans — you can turn down the oven’s temp by up to 25 degrees and get the same results. That’s because these materials retain heat so well, they’ll continue cooking food even after being removed from the oven.

5. Use your oven’s convection feature. When heated air is circulated around the food, it reduces the required temperature and cooking time. You’ll cut your energy use by about 20%.

6. Cook in the microwave whenever possible. Ditto slow cookers. Microwaves get the job done quickly, and although slow cookers take much longer, they still use less energy than the oven. Resist the urge to peek inside your slow cooker: Each time you remove the lid, it releases heat and can add about 25 minutes of cooking time to your dish.

7. Use lids on pots to retain heat. The food you’re cooking on the stovetop will heat up faster when you use lids.

When It’s Cleanup Time  washing_dishes

8. Scrape plates instead of rinsing with hot water. Unless food is really caked on there, your dishwasher should get the dishes clean without a pre-rinse. Compost your non-meat food waste. Check out these other Thanksgiving clean-up tips.

9. Use your dishwasher. It saves energy and water, so only hand-wash things that aren’t dishwasher-safe. Wait until you’ve got a full load before starting the dishwasher. Be sure to stop the appliance before the heated dry cycle; just open the door and let your dishes air-dry.

Visit HouseLogic.com for more articles like this. Reprinted from HouseLogic.com with permission of the NATIONAL ASSOCIATION OF REALTORS®.

3 Brilliant Hacks to Make Snow Shoveling Less Miserable

By Jamie Wiebe

Snow shoveling app

Snow shoveling app?

Don’t break your back shoveling snow. Try these tips to make winter less of a burden.

If you’re a homeowner in a snowy climate, chances are good you rue the winter: All that snow has to go somewhere, and it’s not getting there itself.

Cue the snow shovel.
Barring a move to a snow-free state or barricading your family inside all winter, there’s no way to avoid the endless task of shoveling snow. There are, however, ways to make the process much easier. Here are three simple hacks to make the morning after a snowfall much less stressful.

1. Spray Your Shovel with Cooking Oil

Snow sticking to your shovel makes an already arduous task even more obnoxious. Avoid it with this hack: Lightly coat your shovel with non-stick cooking oil to make snow slide right off. No more time wasted removing snow from your snow remover. (You can substitute a spray lubricant like WD-40, but the downside is it’s toxic.)

2. Lay Out a Tarp Before the Snow

If you like short cuts, this technique, billed as “the laziest way imaginable” to clear snow, according to a tutorial from “Instructables,” has got your name on it. The day before an expected snowfall, lay a tarp on your walkway. When the snow finishes falling, just pull out the tarp, and voilà: an instantly cleared walkway. (Word to the wise: Make sure pedestrians won’t trip on your tarp; include a sign or use this technique in your backyard walkway if you’re concerned.)

The technique requires a tarp, firewood, and twine as well as some prep work. Pre-storm, use firewood to weigh down your tarp — you don’t want it flying away in the wind! — and tie the twine to both the tarp and to a shovel standing upright in your yard. You’ll use the shovel to pull out the snow-laden tarp.

Although this method might be faster than shoveling, it does require manpower. After all, a cubic foot of snow can weigh between 7 and 20 pounds. So don’t get too ambitious with the size of your tarp or you might not be able to pull it once it’s full of snow.

3. Make a Homemade De-icing Cocktail

De-icers make snow removal easier by cutting through the tough, icy layers that are a pain to remove with a shovel. But an easy solution should be easy on your property as well. Many commercial de-icers are pretty harsh.

Commercial ice-melting substances — magnesium chloride, calcium chloride, potassium chloride, and sodium chloride (salt) — all cause damage to the environment, according to the University of Maryland’s Home and Garden Information Center. They can also damage concrete sidewalks and driveways, which mean hefty repair costs later.

A better solution: Make your own de-icer using rubbing alcohol or vinegar. You’ll save money, too. Commercial melters typically cost $8 or more. Plus, you’ll avoid the hassle of trekking to the hardware store to stock up.

Use vinegar before a storm to make ice and snow removal easier:
– Combine 3 parts vinegar to 1 part water.
– Spray or pour gently (you still want to avoid runoff into your landscape) before a storm.

To keep the sidewalks and steps from icing after a storm:
– Combine 2 parts rubbing alcohol with 1 part water.
– Apply to minimize runoff.

Visit HouseLogic.com for more articles like this. Reprinted from HouseLogic.com with permission of the NATIONAL ASSOCIATION OF REALTORS®.


Get Help for Your House!          home-services

Click: