LED Holiday Lights: 6 Need-to-Know Tips

By: G. M. Filisko

LED holiday lights vs. old-fashioned bulbs: 6 tips to help you decide which is right for you.  xmas_lights

Should you chuck all your good old holiday light strings and buy new LED holiday lights? Here’s how to decide.

1.  LED holiday lights save you money. LED lights use up to 90% less energy than traditional holiday lights, according to the U.S. government’s Energy Star program.

That results in a $50 energy savings for the average family during the holidays, says a Sierra Club spokesperson.

Put it into perspective: The amount of electricity consumed by one 7-watt incandescent bulb (in a light string) could power 140 LEDs — enough to light two 24-foot strings, says Energy Star.

2.  But LED lights typically cost more than old-fashioned holiday lights.

  • 100-bulb string of LED lights: about $20 to $46
  • 100-bulb string of conventional lights: about $7 to $12

But shop around because LED prices are coming down. And you’ll likely find sales on LED holiday lights — if not before the holidays then certainly after.

3.  LED holiday lights last and last. LED bulbs can keep your season bright for as long as 100,000 hours, says Cathy Choi, president of Moonachie, N.J.-based Bulbrite, which manufactures LED and regular bulbs. That’s substantially longer than the life of your old holiday light strings.

4. You can string a BIG strand of LED lights. Safety wise, you shouldn’t connect more than three traditional light strings, but you can connect up to 87 LED holiday light strings, totaling a whopping 1,500 feet, Choi says. So blow your neighbor’s display away by cocooning your house in lights:

  • You won’t have to buy as many extension cords.
  • You can take your holiday lighting display further away from the outlet.

5. LED lights reduce the risk of fire. They stay cooler than incandescent bulbs, according to Energy Star.

6. How about that hue? Some people stick with their old lights because they don’t like the brighter hue that white LED holiday lights emit. But Choi says manufacturers now offer a “warm white” bulb that more closely mimics the glow of an incandescent light. Be sure to read the label to choose a bright or warm white and to ensure what you’re purchasing is Energy Star-certified.

Colored and color-changing LED holiday lights are more vibrant than conventional lights, making your display easier to see from the street, Choi says.

Visit HouseLogic.com for more articles like this. Reprinted from HouseLogic.com with permission of the NATIONAL ASSOCIATION OF REALTORS®.


How to Clean Up After Thanksgiving in Half the Time

By: Lisa Kaplan Gordon

The Pilgrims were on to something when they planned a Thanksgiving potluck; here are other good ideas that’ll simplify your T-Day kitchen cleanup.

Want something to be thankful for? Check out these tips that’ll make your Thanksgiving kitchen cleanup faster and easier — and will give you more time to enjoy family and friends.

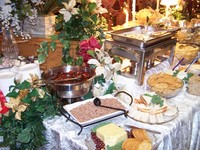
Plan a potluck: The first Thanksgiving wafeasts a potluck; so let your guests share the fun and bring dishes to share. Then make sure they take home their serving bowls and platters, which will cut down on dishes to wash and put away.

Decide on disposable: Leave Mom’s good dishes in the breakfront and set your table with disposable — and recyclable — place settings. Party stores sell plastic dishware that look like real china (12 dinner plates for about $13). After eating, collect and toss. If you can’t stand to set a table with anything but your best, use disposables for hors d’oeuvres and dessert.

Triple-duty cookware: Cut down on cleanup by selecting cookware that can go from oven to table to freezer. Or, serve food in edible containers, such as bread bowls or hollowed-out winter squash, which you can either consume or compost.
refrigerator
Empty fridge: Start your holiday with a clean slate, which will make the inevitable mess less daunting than piling clutter onto clutter. Before beginning Thanksgiving prep, pick up depressing home clutter and clean out your fridge to make room for ingredients and leftovers.

If possible, designate a shelf for Thanksgiving food, which should be empty when you start your meal, then filled with leftovers when you’re finished. In a week, clean out that shelf again. Make soup from leftover meat and veggies, and then freeze. Compost wilted greens. Toss old dairy products.

Prepare roasting pans: You won’t have to clean what you don’t get dirty. So line your turkey roasting pans with heavy-duty aluminum foil, or cook the bird in a bag. Pour drippings into a pot to make gravy, then throw away the liner.

Line garbage cans: Double- or triple-line garbage cans, which saves time when the cleaning campaign begins. After you toss a trash bag, there’s another waiting for action.

Soaking bin: Soak pots and pans as soon as you transfer food to platters. But instead of filling the sink with soaking pots, designate a small trashcan as the soaking spot. Fill it will soapy water and dirty pots, and hide it under a sink or in a mudroom. That way, your sink is free throughout the evening to clean as you go and rinse dishes on the way to the dishwasher.

Stop stains: Don’t let stains on carpet or rings on furniture set. While wine stains are still wet, dab with go-to cleaner hydrogen peroxide mixed with a few drops of dish detergent; blot with a clean cloth. Get rid of water stains on wood furniture with a dab of white toothpaste (not gel). Rub in the direction of the grain.

Pump up the music: Up-tempo music will give you a second wind for cleaning. So turn off the soothing dinner tunes and get rocking with our cleaning playlist.

Visit HouseLogic.com for more articles like this. Reprinted from HouseLogic.com with permission of the NATIONAL ASSOCIATION OF REALTORS®.


9 Ways to Avoid Gobbling Up Energy on Thanksgiving

By: Courtney Craig

Wasting energy on Thanksgiving? Don’t be a turkey.

A Few Days Before Thanksgiving  dimmer_switch

1. Install a dimmer switch for the dining room chandelier. Every time you dim a bulb’s brightness by 10%, you’ll double the bulb’s lifespan. Most CFLs don’t work with dimmers, but you can create mood lighting with incandescents and LEDs. The dimmer switch will cost you about $10.

2. Plan side dishes that can cook simultaneously with the turkey. If you cook dishes at the same temperature at the same time, you’ll reduce the amount of time the oven has to be running — it’s easier for the cook and saves energy, too.

When You Start Cooking

3. Lower your house thermostat a few degrees. The oven will keep the house warm. You also can turn on your ceiling fan so it sucks air up, distributing heat throughout the room.

4. Use ceramic or glass pans — you can turn down the oven’s temp by up to 25 degrees and get the same results. That’s because these materials retain heat so well, they’ll continue cooking food even after being removed from the oven.

5. Use your oven’s convection feature. When heated air is circulated around the food, it reduces the required temperature and cooking time. You’ll cut your energy use by about 20%.

6. Cook in the microwave whenever possible. Ditto slow cookers. Microwaves get the job done quickly, and although slow cookers take much longer, they still use less energy than the oven. Resist the urge to peek inside your slow cooker: Each time you remove the lid, it releases heat and can add about 25 minutes of cooking time to your dish.

7. Use lids on pots to retain heat. The food you’re cooking on the stovetop will heat up faster when you use lids.

When It’s Cleanup Time  washing_dishes

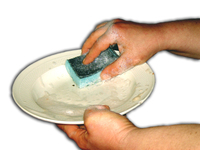
8. Scrape plates instead of rinsing with hot water. Unless food is really caked on there, your dishwasher should get the dishes clean without a pre-rinse. Compost your non-meat food waste. Check out these other Thanksgiving clean-up tips.

9. Use your dishwasher. It saves energy and water, so only hand-wash things that aren’t dishwasher-safe. Wait until you’ve got a full load before starting the dishwasher. Be sure to stop the appliance before the heated dry cycle; just open the door and let your dishes air-dry.

Visit HouseLogic.com for more articles like this. Reprinted from HouseLogic.com with permission of the NATIONAL ASSOCIATION OF REALTORS®.
Tips on How to Win in Bidding Wars

bidding wars

Tips on how to win at bidding wars!

Psst! Trying to outbid others today? Here are tips and links to more.

“The New York Times recently offered some of the following tips from housing experts:

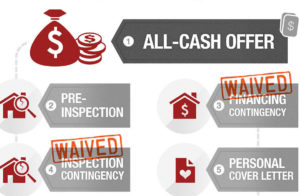
  • Get preapproved for a mortgage. A preapproval letter from a lender – note, not prequalified – can show that a buyer is a strong candidate in obtaining financing.
  • Have a strong start. What can you most afford? Bid accordingly. That said, “don’t go to a point where you think it’s going to be too much to handle,” says Caroline Baccellieri of McClellan Sotheby’s International Realty in Pelham, N.Y. Also, if buyers offer more than the asking price, make them aware that their mortgage lender may still appraise the home at a lower value. This could then leave them having to pay the difference.
  • Waive the mortgage contingency, but … Sellers tend to prefer offers that are not contingent on the buyers’ ability to obtain financing. So in hot markets, an offer contingent on the mortgage could be viewed as a detriment. Yet, without this contingency, buyers can run a risk of losing their deposit if their financing  ends up falling through. They’ll want to weigh this one carefully and consult a lawyer.
  • Don’t just bank on the letter. A heartfelt letter attached to your offer has gotten some buzz lately as a winning strategy. While a nice touch, “don’t expect them to distract the seller from the bottom line.”
  • Cash. And one of the best ways to win a bidding war: Offer cash. Sellers like all-cash offers because it provides more certainty the deal will go through and without delay. If an all-cash offer isn’t practical, have your buyer find other ways to provide the seller certainty that the settlement will go through.”

Click the link below to read the rest of this article.

From:

Help Your Buyers Win a Bidding War

http://realtormag.realtor.org/daily-news/2016/06/24/help-your-buyers-win-bidding-war


General Home Maintenance Schedule Series: The Top Six Myths About Home Inspections

house_inspectionThe Top Six Myths About Home Inspections

By Lisa P. Turner

If you have bought or sold a home, you might have experienced an independent home inspection. This type of home inspection is designed to provide both buyers and sellers with critical information about the health of the home’s systems – heating and cooling, electrical, plumbing, water tightness, roof condition, and safety. This type of inspection is highly detailed and provides a wealth of information on the home. While this type of inspection is not required, it can help buyers avoid a “money pit” and can help sellers understand what things might turn buyers away.

A friend wrote me recently to say that they bought a house and had expected the home inspector to look for termites. After they moved in, they decided to remodel. They discovered that termites had completely eaten the wood structure in 3 walls.

I told them that one of the things home inspectors do not do is inspect for pests, since they are not qualified to identify them. Pest control professionals are qualified to find pest infestations, and should be called in before the purchase. Most of the time your real estate agent will suggest what inspections you should be getting to protect yourself.

This got me thinking about home inspection myths. Here are the top 6 myths.

1. Home inspectors inspect for termites. Myth! Unfortunately for the couple above who believed this, repairs were very expensive.

2. You should not attend the inspection on the home you are buying, because it will disturb the inspector. Myth! Inspectors appreciate their clients attending the inspection and know they can fully communicate the issues with them. Sometimes written reports do not explain everything fully. If the clients are out of town and cannot attend the inspection, they should hold a conference call to discuss report items as soon as practical after the report is completed.

3. The seller is responsible for fixing everything the inspector finds wrong. Myth! Repairs, even serious ones, are negotiable. The sellers may be able to back out of a deal, however, if the inspector discovers serious defects.

4. New construction requires an independent home inspection to get the Certificate of Occupancy. Myth! New construction does require progressive inspections by the municipal building inspector for safety and code enforcement. If you are moving into a newly constructed home, I personally would recommend an independent home inspection also, as it will catch many loose ends.

5. If the home’s appraisal is excellent, there can’t be anything wrong with the home and you don’t need another inspection. Myth! A home’s appraisal is based on many factors, including market conditions, location, and materials (HardiePlank and granite counter tops, for example) but does not inspect for systems actually working or structural integrity.

6. A home inspection will take about 30 minutes. Myth! A thorough home inspection should take from 2-5 hours depending upon the size and complexity of the home. There are hundreds of inspection points on a home inspection, including walking the roof and crawling the crawlspace.
Now that you are the home inspection expert, you can try these questions on your friends and see how they do.

Lisa is an aerospace engineer and building contractor residing in Hayesville, North Carolina. Prior to her engineering position, Lisa inspected homes for home buyers, sellers, owners, and mortgage companies.

Lisa loves flying and building aircraft. Lisa is the first woman to build and fly a Pulsar XP 2-person experimental aircraft. She built 2 aircraft and the major portion of a helicopter between 1995 and 2008.

Lisa enjoys writing about flying, home improvement, and goal setting. She loves to inspire others to reach for their dreams.

Article Source: http://EzineArticles.com/?expert=Lisa_P._Turner